Factory system restore - v2.5
This sub-chapter will outline the process involved in restoring your v2.5 server to its factory defaults and correctly configured to its original settings. To do this you need to restore the system from its restore partition on the C: drive . This process will return all settings back to the original configuration of your Disguise system.
Please note: only machines after January 2012 will have a populated restore partition. This includes all 4U v2.5s. If in doubt over whether your system is included, or if your machine is older then January 2012, please contact the Support team.
Please note: If you need to reimage a machine completely please contact the Support team who will provide a download link to download a copy of the machine image.
Preparing your system for restoration
To prepare your system for restoration:
-
Back up any important files or program installers stored on the C: drive onto an external disk as these will be replaced and lost by the system image.
Please note: this process will have no impact upon any data stored on your systems Media drive. However, to avoid confusion between disks it may be worthwhile removing the media drive from slot 1 on the systems hot swap drive caddy.
-
Make a note of your systems QuickTime Pro Registered To and Registration Code details. This information is in the paperwork you received with each of your systems.
If this is not to hand you will be able get this information by following these steps:
-
Open QuickTime Player (Start menu > All Programs > QuickTime > QuickTime Player ).
-
Select Edit > Preferences > Register . Here you can see who QuickTime Pro is registered to and the Registration Code.
-
Make a note of both of these details.
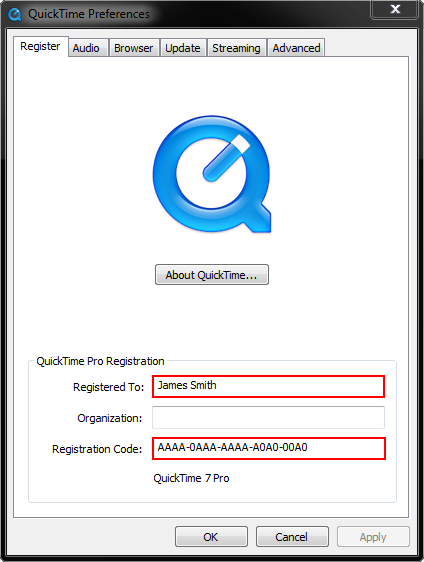
Make a note of your systems QuickTime Pro Registered To and Registration Code details
In addition you will need to deactivate MacDrive 9 before the system is restored.
To deactivate MacDrive 9:
-
Open MacDrive 9 Standard ( Start > All Programs > MacDrive 9 ).
-
Select Deactivate MacDrive Standard .
-
Make a note of the displayed serial number.
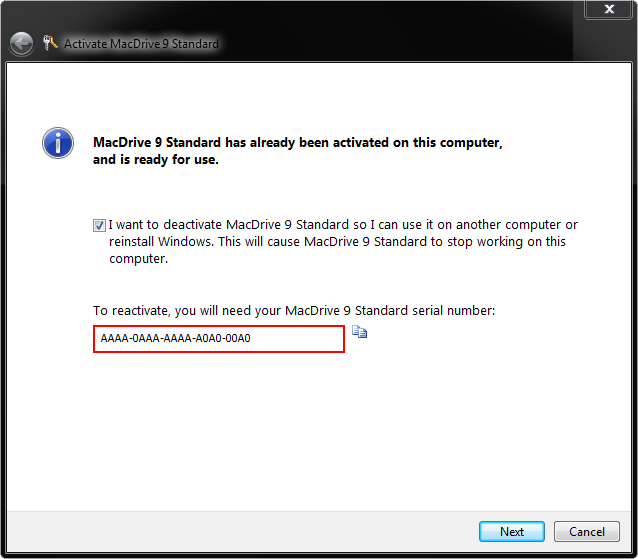
Make a note of the displayed serial number
-
Tick the box I want to deactivate MacDrive 9 Standard so I can use and select Next.
Restoring your system
Once the above steps have been completed you are ready to start the system restore.
To start the system restore:
-
Open the Control Panel (Start menu > Control Panel ).
-
Select Backup and Restore .
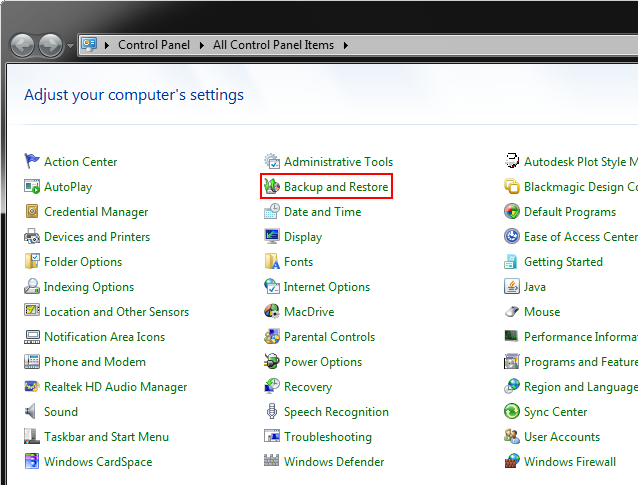
Select Backup and Restore from the Control Panel
-
Select Recover system settings or your computer.
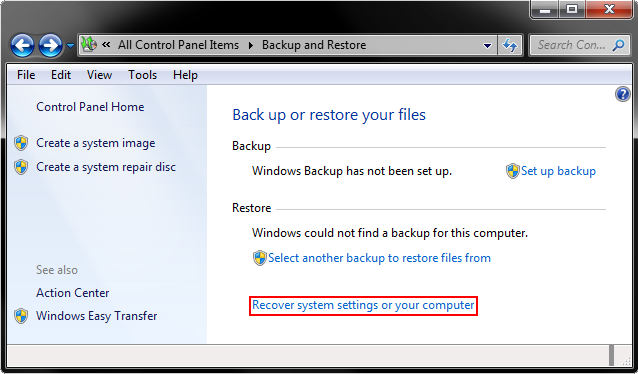
Select Recover system settings or your computer
-
Select Advanced recovery methods.
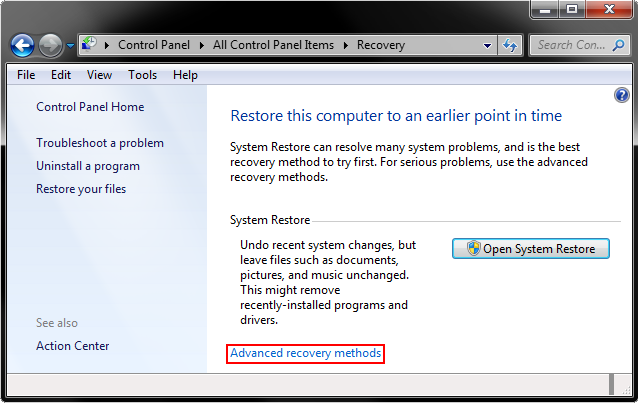
Select Advanced recovery methods
-
Select Use a system image you created earlier to recover your computer.
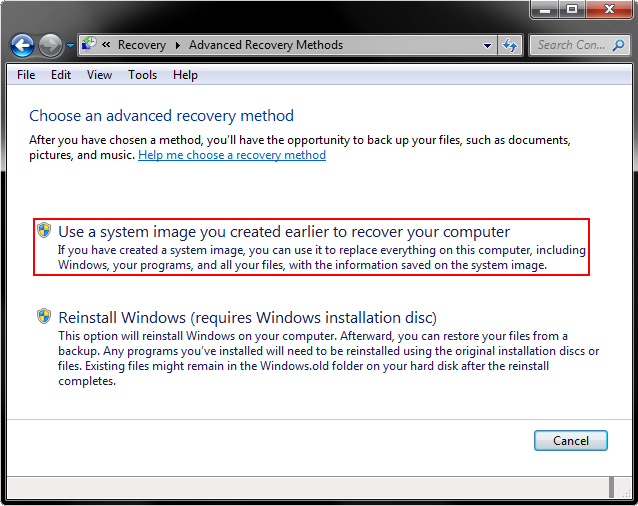
Select Use a system image you created earlier to recover your computer
-
You will then be asked Do you want to back up your files? Select Skip if you followed the instructions above and backed up any important files or program installers stored on the C: drive onto an external disk. If not please backup any important files.
Please note: this process will have no impact upon any data stored on your systems Media drive. However, to avoid confusion between disks it may be worthwhile removing the media drive from slot 1 on the systems hot swap drive caddy.
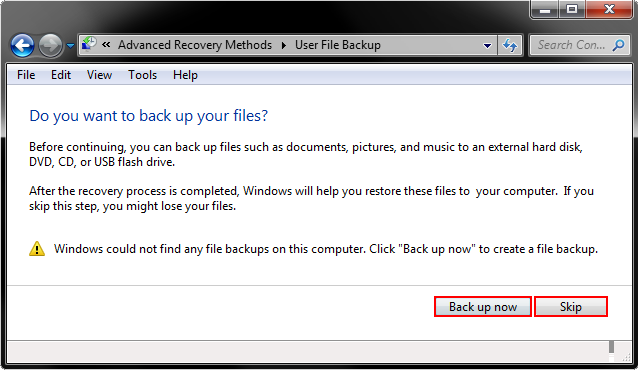
Select Skip if you backed up any important files or program installers stored on the C: drive, otherwise select Back up now
Warning: everything saved on the (C:) drive since you received your system will be lost unless backed up.
-
From here you will be prompted to Restart your computer and continue the recovery. Select Restart.
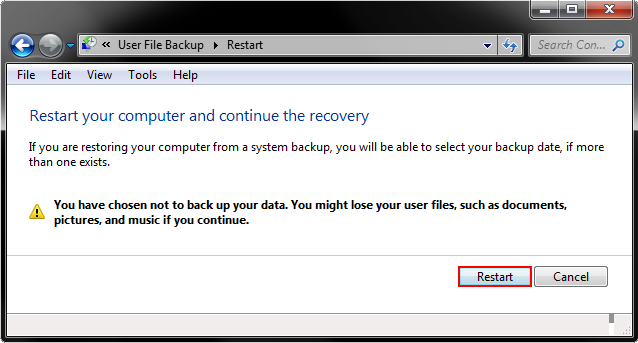
Select Restart
Your system will now reboot into the Windows Recovery Environment.
-
You will be presented with a window asking you to Select your keyboard input method . After doing this Select Next>.
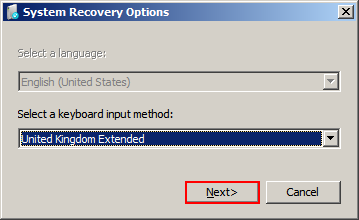
Select your keyboard input method and then select Next>
-
You will then be prompted to Select a System Image Backup. The location should be set to Restore (F:)
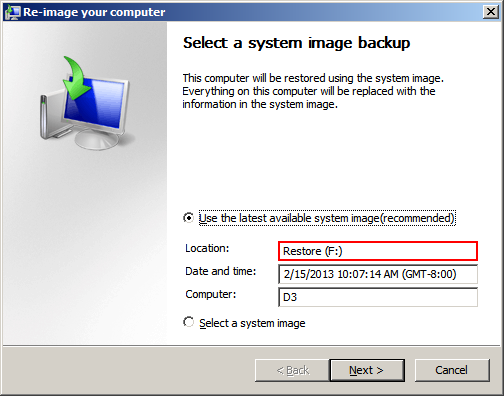
Set the location for your System image backup to Restore (F:)
-
Select Next>.
-
This will be followed by Choose Additional Restore Options , this can be ignored so just select Next>.
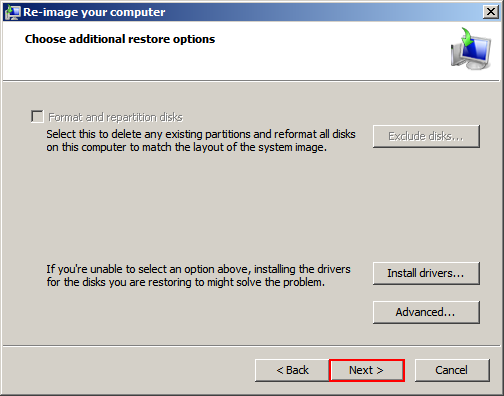
Select Next>
-
After selecting Finish on the following window you will need to confirm that All data on the drives to be restored (C:) will be replaced with the data in the system image. Select Yes.
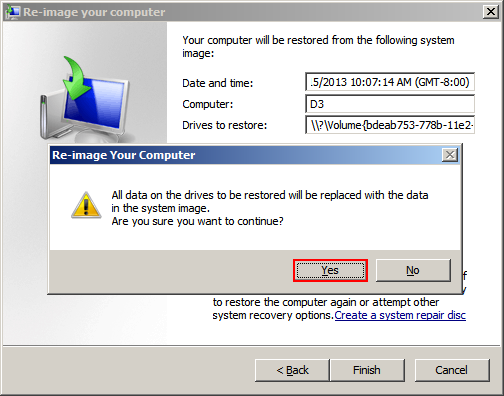
Select Yes
The restore process will then start automatically and should take no longer than 10mins.
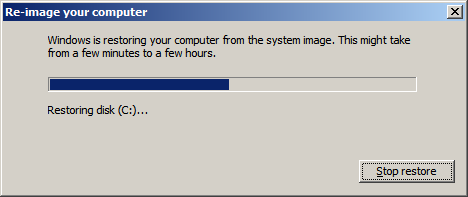
Restore process will start automatically
Once this has completed the system will automatically reboot and will be restored to the factory defaults.
After a system has been restored
-
Once the reboot is complete, you will need to select Cancel on the pop up window stating that Recovery has completed. Do you want to restore your user files?
-
You will then need to restart the machine as prompted.
-
Once the machine has finished its reboot cycle you will need to ensure that the QuickTime and MacDrive Registration keys and Serial numbers have been carried across. This should be the case, however if not you can reactivate the software by following the steps below.
Please note: Additionally, you may need to apply a specific Windows Update (though only apply if actually needed)
QuickTime Pro
-
Open QuickTime Pro (Start menu > All Programs > QuickTime > QuickTime Player ).
-
Open the Edit tab > Preferences > Register. This will open the registration window.
-
Re-enter the Registered To & Registration Code fields recorded earlier.
MacDrive 9
-
Open MacDrive 9 Standard (Start menu > All Programs > MacDrive 9 Standard ).
-
Select Activate MacDrive Standard . This will open the Activation window.
-
Enter the Serial number recorded earlier.